
vectorplexus.com is at https://vectorplexis.com until further notice.
×
Search the Community
Showing results for tags 'Guide'.
Found 4 results
-
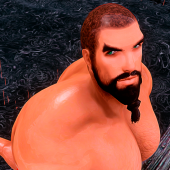
Welcome to the Unofficial SAM "Full" User Guide ABOUT THIS GUIDE This is a simple guide intended for new users who are looking for a walkthrough of the basic functions of Shape Atlas for Men by Vectorplexus. It assumes that the user has successfully installed SAM and its components and is now seeking guidance in making use of SAM's main features. DISCLAIMER 1: I am just a long-term user who was in no way involved in making SAM or any of its assets and has no insight in SAM's coding. As such, some pieces of information might be slightly inaccurate. Corrections and suggestions are always welcome. DISCLAIMER 2: This guide is specifically for the original "SAM Full" release for the old 32-bit version of TESV: Skyrim. Later unofficial releases such as "SAM Light" for SSE/AE do not have the same functionality provided via the MCM. WHAT IS SAM? SAM is a male body replacer mod for the old 32-bit version of TESV: Skyrim and is meant to replace and go beyond the capabilities of its predecessor, Schlongs of Skyrim (aka SOS). It introduces a wide variety of body forms, also called morphs, that can be assigned directly or randomly to male characters in Skyrim. That way, it's possible that no two male NPCs will look exactly the same. This is achieved by introducing three basic body types: "Normal" - Similar to the vanilla body. Ranges from skinny to, well, normal. "Samson" - Muscular, top heavy body. Wide shoulders, small hips. Adds muscle definition to the body. "Samuel" - Fat, almost pear-shaped body. Narrow shoulders, wide hips. Adds softness to the body. To create a virtually endless amount of body shapes, the Samson and/or Samuel morphs are "injected" into the normal body on a scale from 0 to 100. This will be explained in more detail in the "Actor" section further down below. Furthermore, SAM adds male genitals, lovingly called schlongs, that can be scaled and toggled on and off in-game, 5 different degrees of body hair, beast character support, werewolf support and 13 bodybuilder-inspired poses. Whew. As a caveat, all armor and clothes have to be refitted for all three body types in order to function as intended, which was, and still is, a large community effort. If you want to see more armor, clothing and other items for SAM, become active and support this little community! GETTING TO KNOW THE MCM MENU So, you have managed to get SAM up and running. Huzza! But wait a minute, where are the beefcakes, where are the bears? Everybody still looks more or less the same! That's not what we signed up for! Well, to get the most out of SAM, you have to get accustomed to and make use of the settings offered in its MCM menu. Let's take a look. The MCM menu is part of SkyUI, so if it's not in your game, check that SkyUI is installed correctly. If the MCM menu is there, but the SAM menu isn't, wait a few minutes and see if it pops up. If it doesn't, start a new game and see if it loads there. It is possible that SkyUI wouldn't load some MCM menus even though everything is set up correctly. That's a problem within SkyUI, not within SAM and it can happen to any mod with an MCM menu. Sorry. GENERAL SETTINGS Most of the options here alter the way SAM assigns values to NPCs. Enable Automatic Race Settings: If enabled, SAM will assign values to NPCs according to their race. The default values for all races are set to 0 / medium hair, so it is highly recommended to define your own race adjustments in the "Races" tab. Class morph offsets: If enabled, SAM will also morph NPCs according to their class: warriors are more muscular, mages are leaner, etc. Weight Cap: If enabled, the Samuel and Samson values cannot exceed the overall weight of the NPC. For example, if an NPC has the weight 37, the Samuel and Samson values can only add up to 37. If disabled, this rule no longer applies. Note: The weight of an NPC is usually set by the game when the NPC spawns and cannot be changed directly by the player. Variaton Range: The higher the value, the more varied and extreme the randomly assigned body morphs become. At lower values, SAM will adhere more closely to the values set in the "Races" tab. Enable schlongs: If enabled, all male characters will have genitals. If a character is dressed, the schlong will usually be hidden by their clothes (duh). To see what they're packing, you will have to find a way to undress them (e.g. Sexlab or similar mods) or install skimpy armor and clothes, which are available on this website. Skimpy armor that was made for SOS is not supported because it needs to be refitted first. If disabled, schlongs will be replaced by black underwear. WARNING: every now and then, schlongs might still peek through some characters' clothes, especially if they just spawned. That's because schlongs are enabled by default and hiding them is step 2 for the game's engine, which may take a moment to happen (I think). As a work-around, if you absolutely do not want even just the tip of a single dingeling to be seen anywhere at any moment in your game, rename/delete the schlong meshes in the SAM core file in addition to disabling them here. If you activated schlongs but guards still wear undies, that's most likely because you've installed Vector's Optional Legacy Skimpy armors. In which case, those undies are in fact their armor. They are very effective. Absolutely necessary and in no way superfluous visual aid for the schlong toggle: (Note: Game does not actually display eggplants. There's a schlong under there.) Overrides: this button resets the values SAM has assigned to all characters up to that point. Meant for trouble-shooting primarily. Export/Import settings: all your settings can be saved and loaded via these buttons. By pressing the Export button, a file called "SAM.json" containing your current settings will be created in your data folder. Pressing "Import" will read that file and apply its settings to your save file. Very useful if you start new games often. SCALING In this menu, you can chose which characters SAM should affect and customise the scaling of different body parts to your liking. Body Options Most of these options are fairly self-explanatory. However, the schlong options won't be present if schlongs are disabled in the general tab. NPC body scaling and NPC Schlong scaling are toggled off by default to save system resources. Enabling them means that the engine will assign moprhs to all male characters that get loaded into the game. This can stress the engine considerably as NPCs are loaded and unloaded constantly in the background. The Scale multiplier affects all male NPCs. It is set to a believable value by default. Use responsibly. Or be an insufferable size queen, it's your game and nobody is judging you (openly). Proportion Settings Here, you can adjust the proportions of the Samson and Samuel morphs to your liking. If things get too wild, the Original Values buttons reset your inputs in this menu. ACTORS In this menu, you can assign Samuel and Samson values as well as schlong options to your character and currently loaded male NPCs around you. Actor: Choose which currently loaded male actor you want to alter. Default is your character. Overrides: Same button as the one under the general tab. Body Options These options are probably the ones you will use the most. Here, the values SAM applies to the character that you chose in the Actor field are shown and can be adjusted to your liking. The weight slider is only available for the player character. Schlong options are hidden if schlongs are disabled in the general tab. Weight: Vanilla weight slider. Make the character broader or slimmer. Height: Make characters bigger or smaller. Adjust in small steps as even a change by 1 unit already makes a noticeable difference. Samson / Samuel slider: Choose how much of each body morph should be injected. Max combined value is 100 by default. See table below for visual aid. Texture: Choose between different texture sets. Available options are based on the character's race. By default, there are 5 degrees of hairiness for human and elf races. Khajiits have two texture options (smooth and striped), Argonians only have one default option. Body hair is black by default, which cannot be altered. For coloured body hair, choose the smooth option and use Racemenu overlays (i.e. tattoos) as a work-around. Here is a table of different combos of Weight, Samson and Samuel values at default scaling settings. And here are the default hair textures (part of the default texture set in the download section of SAM after clicking the "Download this file" button): (Note: Khajiits and Argonians have their own texture sets not shown above. Body morph values used for this character are 100 weight, 40 Samson, 60 Samuel.) Schlong Options Note: To keep this guide SFW, there is no visual aid available for this section. Schlong Size: Alters the schlong's size, primarily its length. Schlong Taper: Makes the tip of the schlong narrower. 0= evenly wide, 100 = strongly tapered towards the tip. High values also shorten the schlong noticeably. Testicle Size: slider from -50 to +50, default is 0. Makes the testicles bigger or smaller. Cut: Toggle foreskin on and off. RACES This menu lets you define different base values for each race. If you want all your Orcs to be shaved bodybuilders with footlong schlongs and all Nords to be hairy uncut bears without having to adjust them all one by one, this is where you can make this happen. Settings made in this menu will only be applied if the "Enable Automatic Race Settings" option is toggled ON in the general tab. Note: Values entered here usually only affect NPCs that have never been loaded before by the game. NPCs you have encountered before will already have values assigned to them that persist within your save file. Most options work exactly like the options in the Actor tab. Options that behave differently are: Race: choose which race you want to alter. Texture Lock: Make all characters of the chosen race have that particular texture. If unticked, variations can occur based on the "Variation Range" setting in the general tab. Cut: In this tab, the cut option is a slider rather than a toggle on/off button. Sets the probability of characters of the chosen race being cut or uncut. 0= everyone is uncut, 100 = everyone is cut. Werewolf Options in this tab are fairly self-explanatory. IMPORTANT: Werewolf options can only be set when the character in question is currently in werewolf form. Vice versa, the values in the "Actors" tab can only be changed while the character is in its human form. Values from the "Actors" tab carry over for the character's werewolf form and adjustments made in this menu persist over transformations. Finally, let's talk about the features not accessible via MCM. SAM Poses and SOS console commands SAM contains 13 poses for your pleasure. FNIS is required to play them in-game. Important note: when running the FNIS tool, make sure to toggle the "Skeleton Arm Fix" option ON. To play the poses, open the console in-game and use one of the following commands. Note: console commands are not case-sensitive when entered into the console in-game. player.SAE SAMPoseXX SAE SAMPoseXX The first version plays the pose for the player character, the second version plays the pose for the character selected in the console (left click on them while the console is open). Replace XX with a value from 01 to 13 to play the according pose. Alternatively, you can use mods such as Poser Hotkeys to access poses, be it from SAM or other poser mods. Also, some console commands carry over from SOS (Schlongs of Skyrim). These include: SAE SOSFlaccid //turn schlong flaccid SAE SOSFastErect //get erection quickly SAE SOSErect //get erection gradually SAE SOSBendXX //replace xx with value from -9 to 9 to adjust erection angle, default=0 Again, add player. before the command to target the player character. After entering these commands, the error message "The event was not processed by the graph" will be displayed; this is expected behaviour and can safely be ignored. The commands will be executed once you close the console. Thank you for reading the unofficial SAM User Guide. Thank you so much @Vector for making SAM and entertaining this forum, and thank you to all mods and active community members for making this a lively place. Thank you @Felio for providing some corrections and clarifications. Additions, corrections and suggestions are always welcome. Have fun with Skyrim and Shape Atlas for Men! Last note: Screenshots were taken by me. ENB preset is Rudy ENB (NLA version). Body textures are the default SAM HD textures. Beard is from Hirsute Beards.
- 37 replies
-
- 13
-

-

-

-
I've been noticing a few people having issues with their SAM installation so I've finally gotten around to writing a quick tutorial for you guys. First off you will need: SKSE SkyUI Realistic Ragdolls & Force (Needed for RaceMenu 3.4.5 & SAM-based physics mods) HDT Physics Extensions (For RaceMenu 3.4.5 & physics) RaceMenu (Use the older v3-3-0 if you don't want to install the HDT stuff) SAM Core SAM Textures (SD, HD or 3rd Party) SAM Vanilla Skyrim Refits XP32 Maximum Skeleton Extended (For RaceMenu 3.4.5 & physics, overwrite SAM's skeleton) Soft requirement: The Unofficial Patch (currently USLEEP) And optional but really tasty: Modular/Skimpy Armours (Install after / on top of the Vanilla Refits since these only change the body armour) Once you've got all the files install them manually (not recommended) or with your favourite mod manager (Nexus Mod Manager or Mod Organizer). Once you've got that your load order should look something like this. The screenshot from Mod Organizer so my mod list is on the left and load order on the right. USLEEP, Bug Fixes, Crash Fixes & OneTweak are stability/performance mods I also use, Alternate Start skips the intro cutscene before character creation and gives you different starting options and RaceMenu adds extra character customisation options. The Unofficial Patch & Alternate Start mods are not required, but you'll see a neck gap on some clothes if you don't install USKP/USLEEP. Below are pics of the Wolf Armour in Normal, Skimpy and Nude (With schlongs disabled in the MCM menu) And if all goes well hopefully you'll be able to enjoy the (much improved) male population of Skyrim a little more. UPD.: In order to fix neck gap on some clothes, move USLEEP below SAM armor refit mods.
- 315 replies
-
- 23
-
-
-
-
 Hey guys. I know there's Naurdor's guide here teaching the basics to install SAM and some other tips with different mods and some optimization. I used his to make this one, which I hope will solve most of the doubts the new users have when installing SAM along with other mods. I also checked a lot of tips you guys gave and compiled with the info I had when B3lisario modified some os SAM's original functions in order to optimize it. Anyway, lets start with this guide then: 1. Preparing Skyrim for Mods. Moving a Steam Installation and Games: https://support.steampowered.com/kb_article.php?ref=7418-YUBN-8129 2. SKSE Installation. Link for SKSE: http://skse.silverlock.org/ 3. Download, Installing and Setting up Mod Organizer. Mod Organizer V.1.3.11 link: https://rd.nexusmods.com/skyrim/mods/1334?tab=files Now that we sorted the profile for our mods, let's check a thing below... A little explanation about automatic download (nexus files) and manual downloads (usually non nexus): We need to configure a account name and a password in order to enable automatic downloads on Mod Organizer. 4. Installing SKYUI. SKYUI link: https://rd.nexusmods.com/skyrim/mods/3863?tab=files 5. Download SAM main files. The files are available at: Installing SAM-Core Installing SAM Texture HD or SD (Pick one or another). 6. Installing Racemenu. Racemenu link: https://rd.nexusmods.com/skyrim/mods/29624 7. Installing Realistic Ragdolls and Force. Realistic Ragdolls and Force (Realistic Force Version) link: https://rd.nexusmods.com/skyrim/mods/601?tab=files 8. Installing HDT Physics Extension. Link for HDT Physics Extension: https://rd.nexusmods.com/skyrim/mods/53996?tab=files 9. Installing KouLeifoh's HDT BBB Bounce for SAM. The mod can be found here: 10. Installing Fores New Idles (FNIS). Can be found on Nexus: https://rd.nexusmods.com/skyrim/mods/11811 The same process must be done with the file FNIS Creature Pack 6.1 11. Installing Groovtama's XPMSE. XPMSE v.3.94 can either be downloaded over Loverslab or Nexus 12. About SAM armor packs... 13. Adding FNIS or any other tool to Mod Organizer Executables. 14. Activating my installed mods and ordering their plugins.... 15. Creating Skyrim's configuration files on MO's Profile folder. 16. Finishing touches: Running FNIS for Skeleton patches and animations. 17. Final: Before running the game don't forget to install patches to fix issues. Issues on a Game without USKP/USLEEP (Neck gaps): Fixed with USLEEP on my game: Game with SAMHands fix2.zip overwriting SAM Core (Wrist gaps fixed):
- 18 replies
-
- 17
-
-
-
- sam
- mod organizer
- (and 3 more)
-
This tutorial is going to provide some basic information on what modular armors are and how the user can easily customise them using the program Nifskope. If you know of armors that are modular, feel free to mention them in this thread so people can find them! OVERVIEW / TL;DR Part 1: remove armor parts Install Nifskope Open armor_0.nif in Nifskope right click the parts you want to delete in the right pane Block > Remove > OK save changes repeat for armor_1.nif Part 2: make armor revealing (aka show the schlong) find the NiTriShape SAMRevealing in the left pane and expand left click BSLightingShaderProperty find the Alpha value in the lower pane and set it from 0 to 1 (0= invisible, 1 = opaque) save changes (also in both *_0.nif and *_1.nif) SLOW AND CLEAR I. What do you mean, 'modular'??? In the vast and exciting world of Skyrim modding, an armor set that is described as 'modular' usually consists of several pieces of armor that can be equipped individually in-game. While that is cool and all, it is not the kind of modular we mean in this tutorial. In the context of SAM, "modular armors" are armors that appear as one single equippable item in-game but have been 'cut up into pieces' for external editing. The idea is that you can hide or delete the armor parts you don't want to create armors that are as revealing as you want them to be. Not many of these modular armors have been created, but for the few modular armors that do exist, this tutorial will teach you how to make use of their unique feature. The only way to identify if a piece of armor is 'modular' in that sense is to open it in a program like Nifskope and check. This is what a non-modular armor looks like when you open it in Nifskope. The whole armor is one big shape that can't be edited without extensive know-how. And this is what a modular armor looks like in Nifksope. The armor is split up into several shapes that can easily be edited independently from each other even with little know-how. II. Getting ready to do the thing The only tool you need to edit modular armors is Nifskope. The latest build at the moment of writing is 2.0 Dev 7. Some people prefer older builds, but it doesn't really matter for our purposes. Download the archive, unpack it to wherever you fancy and Bob's your uncle. Next, we need some modular armors to actually edit. The most prominent ones are the originals by Vector. They are available on SAM's main download page. Download the archives, unzip them and locate the main armor files. Alternatively, install the files with your mod manager of choice first and open them afterwards through your mod manager. The files we want to modify are the cuirass/armor meshes. Boots, gauntlets and helmets don't matter for our purposes, so simply leave them alone. Also, notice that there are two files of everything, a *_0.nif and a *_1.nif . This is necessary for SAM to function correctly. Thus, if we make changes in one of the files, we need to make the same changes in the other file as well to retain functionality. III. Do the thing Note: What we are going to do to the .nif files is irreversible, so you should keep a back-up copy of the original files in case you are unsatisfied with your edits or want to switch back and forth between them. Now, let's start by editing the Daedric cuirass as an example. It is located at SAM-Optional-Legacy-Skimpy-Armors\Meshes\Armor\Daedric 1. Open daedriccuirass_0.nif in Nifskope. It will look something like this: Note: The funky colors are Nifskope 2.0's way of telling you that it is unable to find the armors' textures. If they bother you, click on the light bulb in the upper tool bar and then on the icon that shows a grey checkerboard to make everything appear as grey. In older versions of Nifskope, everything will be displayed as grey from the get-go. 2. Right click on the part of the armor you want to remove. In the menu that appears, go to Block > Remove . Click OK if a warning appears and the shape will be deleted. Repeat with all armor parts you want to remove. Note that in this particular armor, the glowy parts are also individual pieces, so don't forget to delete them as well if you remove the meshes underneath or they will float in thin air later in-game. 3. Save your changes. Then close daedriccuirass_0.nif and open daedriccuirass_1.nif. 4. Delete the exact same parts you deleted in daedriccuirass_0.nif. Save and close. 5. If you edited the files before installing them, repack everything to a new archive, give it its own name and install it like you would any other mod. And that's it, you successfully customised a modular piece of armor. Again, deleting the meshes is irreversible, so always keep a back-up copy of the original, unedited file. IV. Make modular armors revealing If you want these armors to be revealing, just deleting the underwear mesh won't be enough. A few extra steps are necessary to let it all hang out. 1. Delete as many armor parts as you like following the steps above. Notice that you don't need to remove all shapes that cover the crotch area for this to work, but the schlong might clip through anything directly in front of it. 2. Once you are satisfied, look at the left pane and find the NiTriShape SAMRevealing. Expand it by clicking on the little arrow next to it and left click on BSLightingShaderProperty. 3. In the lower pane, find the Alpha value. Left click on the numbers and set them from 0 to 1 (0 = invisible, 1 = opaque) 4. Save your changes. Don't forget to make the same edits in both the *_0.nif and *_1.nif files. Note 1: If the piece of armor you are editing doesn't have a SAMRevealing node, it can't be made revealing with this method. In that case, you may want to ask the mod author for help. Note 2: If there are gaps around the schlong when you equip your edited armor, the file is probably faulty and you may want to try a different mod or ask the mod author for help. And that's it! One last thing to note is that you don't have to delete the armor parts. Instead, you can do the same thing we did with the SAMRevealing node: click on the armor part you want to edit in the left pane, go to its BSLightingShaderProperty page and set the Alpha from 1 to 0. If you do it this way, you can easily reverse your edits. The downside to that is that not all armor parts have a BSLightingShaderProperty page attached to them, so it doesn't always work. Have fun!


