vectorplexus.com is at https://vectorplexis.com until further notice.
×
Author


KouLeifoh
-
Content Count
741 -
Joined
-
Days Won
172
Everything posted by KouLeifoh
-
 The issue for me is finding a setup that works since a lot of the time, collisions are configured for interactions with the female body only. The reason I added the "actor" version is because of this (female body being global default while everything else is an afterthought). I'd rather not be part of this issue that plagues the modding community. At the very least, I want to add collisions to the scrotum so it doesn't constantly clip through the penis during movement.
 -
I have some free time this month, so I'm hoping to get around to doing that along with a few other things. Also, being Pride month is more of an incentive for me.
-
The best thing to do would be to reinstall my mod to make sure it's not an issue with the HDT-PE body mesh/xml being missing or overwritten.
-
As I mentioned before, SAM and RaceMenu rely on the NiOveride plugin. The current release of NiOveride for SE (renamed to "skee") still doesn't support bodygen which is required for body morphs/overlays/etc. There's nothing I can do about that. With that being said, I don't have permission to distribute modified scripts from SAM's core.
-
There's no way around it other than manual edits or using a different texture entirely. As I mentioned elsewhere, improving SAM's default textures has been a small side project of mine. It's mainly for the people of this community since I have my own personal custom textures that I use. This is just a small preview of the current progress on the body texture using the original SAM meshes. The diffuse texture was color matched with my custom texture, upscaled to 4k, cleaned up a bit, and combined with my custom skin pore maps. The normal and specular maps are entirely custom and will be released at a later date.
-
Unfortunately, you'll have to edit all of them since they're all used by SAM. It's a relatively simple but tedious process of copying and pasting. There's no way around it other than using a single texture set.
-
The weights for body bounce are stored on the body mesh itself. I want to revist the HDT BBB mod and smooth out some of the weights to reduce sharp edges before transferring them to the high poly body. In the meantime, don't use the high poly body if you still want the body bounce from HDT BBB.
-
This is just a mesh replacer. The meshes are in Oldrim format, but they'll work for SE too.
-
That might be a bit overkill, but it shouldn't be hard to do. Keep in mind that texture quality matters too.
-
They're only needed if a reasonable amount of skin is showing. The feet meshes are pretty much done, but I'm currently redoing the hand mesh and tweaking the weights for the body mesh.
-
The weights to determine body bounce are stored on the body mesh itself. You can use the high poly hand and feet meshes but not the body. Once I'm satisifed with the weights for the body, I'll add support for body bounce later.
-
-
It's not needed. My mod already uses the correct hand mesh as the base. I've tested it in 3rd person and 1st person in both Oldrim and SE. The weights still need a bit of fine tuning, but I'll come back to that once I'm done with the fingernail meshes.
-
[LE] SAM Installation Guide for Skyrim LE
KouLeifoh replied to Naurdor's topic in The Elder Scrolls V: Skyrim
Some refits don't include 1st person models. -
Version 1.5
169,562 downloads
This is a high poly conversion of SAM meshes. The resulting meshes are smooth and contain around 4x the amount of vertices while still being usable for general gameplay. It started out as something for my own personal use, but I decided to share it with everyone. Compatible with SAM and SAM Light for both LE and SE. High Poly Body Mesh high poly body for both SAM and SAM Light variants underwear was given high poly treatment there are some minor sharp edges on certain poses due to weights if you're on a low end system and worried about performance, stick with the default body mesh High Poly Genital Mesh new high poly genitals for both SAM and SAM Light smoother edges are noticeable when zoomed in High Poly Hand Mesh high poly hands for playable human and beast races new mesh is based on the vanilla HandMaleBig mesh optional fingernail mesh to enhance details hand mesh v2 requires manual texture editing for fingernail textures High Poly Feet Mesh symmetrical feet meshes (original mesh had a smaller right foot) optional toenail mesh to enhance details even further feet mesh v2 requires manual texture editing for toenail textures High Poly Tail Mesh new high poly tail meshes for Argonian and Khajiit races vertex weights smoothed to look less blocky during movement Refits full vanilla refits made specifically for high poly SAM minor clipping may occur during movement currently does not include: briarheart body mesh or USLEEP/USSEP changes Fingernail/Toenail Mesh Texture v1 mesh uses a separate texture for the fingernails/toenails. Color won't change, but certain skin tones might make the nails look out of place. v2 mesh requires the fingernail/toenail textures to be on the same texture as the hand/body. This allows the use of the skin shader to change the color of the nails to match skin tone. Use the provided texture resources to copy and paste the fingernails into the hand textures and the toenails into the body textures. Installation If using a mod manager, just follow the installer. Manual Installation 00 and 01 - high poly body + genital meshes, select between SAM or SAM Light (cut or uncut) 02 - hand mesh, select between high poly hand with or without fingernail meshes 03 - feet mesh, select between high poly feet with or without toenail meshes 04 - high poly tail meshes for Argonian and Khajiit 05 - refits, each subfolder covers a specific armor part (body, hand, feet), base folder covers all armor that does not include skin Credit goes to Vector for the creation of Shape Atlas for Men. -
View File SAM High Poly Conversion This is a high poly conversion of SAM meshes. The resulting meshes are smooth and contain around 4x the amount of vertices while still being usable for general gameplay. It started out as something for my own personal use, but I decided to share it with everyone. Compatible with SAM and SAM Light for both LE and SE. High Poly Body Mesh high poly body for both SAM and SAM Light variants underwear was given high poly treatment there are some minor sharp edges on certain poses due to weights if you're on a low end system and worried about performance, stick with the default body mesh High Poly Genital Mesh new high poly genitals for both SAM and SAM Light smoother edges are noticeable when zoomed in High Poly Hand Mesh high poly hands for playable human and beast races new mesh is based on the vanilla HandMaleBig mesh optional fingernail mesh to enhance details hand mesh v2 requires manual texture editing for fingernail textures High Poly Feet Mesh symmetrical feet meshes (original mesh had a smaller right foot) optional toenail mesh to enhance details even further feet mesh v2 requires manual texture editing for toenail textures High Poly Tail Mesh new high poly tail meshes for Argonian and Khajiit races vertex weights smoothed to look less blocky during movement Refits full vanilla refits made specifically for high poly SAM minor clipping may occur during movement currently does not include: briarheart body mesh or USLEEP/USSEP changes Fingernail/Toenail Mesh Texture v1 mesh uses a separate texture for the fingernails/toenails. Color won't change, but certain skin tones might make the nails look out of place. v2 mesh requires the fingernail/toenail textures to be on the same texture as the hand/body. This allows the use of the skin shader to change the color of the nails to match skin tone. Use the provided texture resources to copy and paste the fingernails into the hand textures and the toenails into the body textures. Installation If using a mod manager, just follow the installer. Manual Installation 00 and 01 - high poly body + genital meshes, select between SAM or SAM Light (cut or uncut) 02 - hand mesh, select between high poly hand with or without fingernail meshes 03 - feet mesh, select between high poly feet with or without toenail meshes 04 - high poly tail meshes for Argonian and Khajiit 05 - refits, each subfolder covers a specific armor part (body, hand, feet), base folder covers all armor that does not include skin Credit goes to Vector for the creation of Shape Atlas for Men. Submitter KouLeifoh Submitted 04/11/2018 Category The Elder Scrolls V: Skyrim
- 44 replies
-
- 17
-

-

-

-
While I don't have much experience with GIMP, the process is relatively the same. Make sure you have the GIMP DDS plugin. If your base body texture is 2k (2048x2048), resize the genital texture to 256x256. If your base body texture is 4k (4096x4096), resize the genital texture to 512x512. Use your base body texture as the bottom layer (don't load mipmaps). Load the corresponding layout template into a layer above that. Copy and paste the resized genital texture into a 3rd layer (after pasting, right click on its layer and select "To New Layer"). Move the genital texture until it fits perfectly into the green box of the layout template. Temporarily hide the genital layer. Select the layout template layer to make it active and use the fuzzy select tool (threshold 1.0, antialiasing off) on the green color. Select the genital texture layer (don't forget to unhide it) and press delete. This will get rid of excess area around the genitals. You can now delete the layout template layer. If everything looks good, merge the layers before exporting to .DDS. For export options, compression: BC1 (or none) and mipmaps: generate mipmaps. If you're exporting a normal map (_msn), I recommend using no compression to keep the finer details intact. Compression will make odd bumps and artifacts appear on the skin during gameplay.
-
You may have misunderstood me. When I refer to the uv, I'm referring to the texture mapping on the mesh, not the actual texture itself. The seam issue is from the original mesh. If you look at the original mesh closely, you'll notice that the left and right feet aren't the same. To correct this, I mirrored the left foot to replace the right foot. In doing so, the uv changed, hence the seam issue. The uv for the left foot when mirrored is not an exact match to the right foot. I had to overlay it with the original right foot uv as a guide and manually snapped the vertices of the new right foot uv in place to create a 1:1 match. Once I made this symmetrical feet mesh as a usable working base (which will be included as an option in the final package), I proceeded with my high poly conversion. As far as uv changes during subdivision goes, I made it so the original uv didn't change. The additional vertices were simply added to it. This keeps the mesh compatible with all texture mods. The method you're alluding to is using detailed textures to compensate for a low poly mesh. This is something I heavily use on my own custom textures. The scope of this mod is to simply provide a high poly, smooth mesh to use. The original textures were untouched. The optional nails will be using their own texture set. Personally, the only SAM texture I use is the normal map for the genitals. Everything else is either custom made or from a different source. Some other players may be in the same boat. So, I want to keep compatiblity as high as possible.
-
Thanks, but I have it all covered through trial and error. I figured out how to keep the vertex count and order the same across all feet meshes. This allowed me to modify the feet mesh for each weight/morph without having to redo them from a single mesh. To make the feet symmetrical, I had to delete the right foot mesh, mirror the left foot mesh, and manually adjust the vertices/uv for seams. As for the high poly conversion, I converted the triangles into quads and then applied NURMS subdivision to increase poly count and smooth the mesh while keeping the basic shapes of the ankles and heels. As of right now, the feet mesh itself is finished. The toenails still need texture work. I need to fix the uv and generate a model space normal map. The high poly body is pretty much done and the hands need to be redone since the fingers ended up looking more like noodles than actual fingers. I want to package them in a single release rather than constantly update them as I go.
-
Here's a preview of what the toenail and fingernail meshes currently look like. The textures aren't finished yet. I might have to redo the fingernails since they do look a bit thin.
-
Don't expect anything dramatic. The edges are overall more smooth. It still comes down to texture quality if you want a much more noticeable difference. This is the full high poly body with high poly hand and feet meshes (head mesh is high poly too, but I didn't create it). Screenshot was taken in 4k and cropped. The full outline of the hand mesh is hard to see, but I'll take a better screenshot once I'm ready to release the full set. I still want to add toenail (and possibly fingernail) meshes.
-
That might be due to the Consistency Flag CT_STATIC on the mesh. I forgot to set it to CT_MUTABLE. While working on the feet meshes, I've noticed that they don't match on the vertex level. The right foot is slightly smaller and has a higher heel. It's something I can no longer unsee. Once I'm satisifed with the high poly body and hand meshes to complete the set (and make a proper download), I'll see if I can fix the feet to make them symmetrical.
-
-
The texture space used for the nails is small already. There's definately room for improvement. The idea of making a separate mesh for the nails did cross my mind, but it might be more trouble than it's worth. I'll consider looking into experimenting with that later. Improving and enhancing SAM's default textures is a small side project of mine albeit a low priority. I started with upscaling the diffuse textures to 4k and applying my skin pore template on top of it. These screenshots are taken with the resulting textures along with my custom normal + specular + subsurface maps.
-
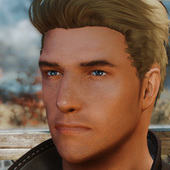
It's a custom face texture I created based on Cullen from Dragon Age. I used this preset as the base and adjusted a few things from there like chin and nose.